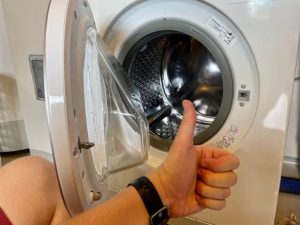
Safely Disconnecting a Washing Machine: Step-by-Step Guide
Introduction: Understanding the Importance of Proper Disconnection
In 2024 whether you are moving to a new home, replacing your washing machine, or performing maintenance, knowing how to disconnect a washing machine safely is essential. Proper disconnection ensures the safety of both the appliance and the surrounding area, preventing damage and potential accidents. In this comprehensive guide, we will provide a step-by-step process to help you safely disconnect your washing machine.
Safely Disconnecting a Washing Machine: Step-by-Step Guide
Gather Necessary Tools and Materials:
Being Prepared for the Task
Before starting the disconnection process, gather the following tools and materials:
a. Adjustable wrench b. Screwdriver (specific to your washing machine model) c. Bucket or towels d. Pliers (if needed) e. Teflon tape (for plumbing connections)
Having these items on hand will ensure a smooth and efficient disconnection process.
Turn off the Power and Water Supply: Prioritizing Safety
a. Unplug the washing machine: Locate the power cord attached to the washing machine and unplug it from the electrical outlet. This step ensures that there is no power supply to the appliance during the disconnection process, minimizing the risk of electric shock.
b. Turn off the water supply valves: Locate the hot and cold water supply valves connected to the washing machine’s hoses. Rotate each valve clockwise until it is fully closed, ensuring that no water flows into the machine during the disconnection process.
Prepare for Water Drainage:
Managing Excess Water
a. Consider draining excess water: If your washing machine has water inside, it’s important to drain it before disconnecting. Some washing machines have a drain tube or pump filter designed for water removal. Consult your user manual to locate and follow the instructions for draining excess water properly.
b. Position a bucket or towels: Place a bucket or towels near the washing machine to catch any water that may spill during the disconnection process. This prevents water damage to the surrounding area and keeps it safe and dry.
Disconnect the Water Supply Hoses: Safely Removing Connections
a. Access the water supply hose connections: Move the washing machine slightly away from the wall, providing enough space to access the hoses. In some cases, you may need to remove an access panel at the back of the machine to reach the connections.
b. Use an adjustable wrench: With an adjustable wrench, carefully loosen the hose connections at the back of the washing machine. Rotate each connection counterclockwise until it is loose enough to be removed by hand. If the connections are tight, you can use pliers to provide extra leverage.
c. Drain residual water: Once the connections are loose, water may still be present in the hoses. Aim the hoses towards the bucket or towel to drain any remaining water. Carefully remove the hoses completely once they are drained.
d. Inspect and clean the connections: Take this opportunity to inspect the hose connections for any signs of damage or corrosion. Additionally, clean the connections with a cloth to remove any dirt or debris.

Disconnect the Drain Hose:
Ensuring Proper Removal
a. Locate the drain hose: The drain hose is usually connected to a drain pipe or standpipe near the back of the washing machine. Follow the hose from the washing machine to find the connection point.
b. Loosen the clamp or remove the hose: Depending on the type of connection, you may need to loosen a clamp or simply remove the hose from the drain pipe. Use a screwdriver or pliers, if necessary, to perform this step carefully.
c. Position the hose for drainage: Similar to the water supply hoses, the drain hose may still contain residual water. Direct the end of the hose towards the bucket or towel to drain any remaining water before completely removing the hose.
d. Inspect and clean the drain hose: Take this opportunity to inspect the drain hose for any clogs, cracks, or damage. Clean the hose with a cloth or wire brush to remove any debris or lint that may have accumulated.
How to disconnect a washing machine – Disconnect the Power Cord:
Removing the Electrical Connection
a. Locate the power cord connection: The power cord is usually attached to the back of the washing machine near the top or side. Carefully identify the location of the power cord connection.
b. Unplug the power cord: Firmly grasp the power cord near the connection point and gently pull it straight out from the washing machine. Avoid harsh tugging or yanking to prevent damage to the cord or the machine.
c. Organize the power cord: Once the power cord is unplugged, carefully organize it to prevent tangles or tripping hazards. You can use cable ties or cord management solutions to secure and neaten the power cord.

Gather Necessary Tools and Materials
Before starting, gather the following tools and materials:
- Screwdriver (both flathead and Phillips head)
- Adjustable wrench or pliers
- Bucket or bowl to catch water
- Towels or rags to clean up spills
- Safety gloves and goggles (optional)
Turn Off Electricity Supply
Safety always comes first. Locate your home’s circuit breaker panel and switch off the circuit dedicated to the washing machine. If you’re unsure which one it is, switch off the main power supply or remove the appropriate fuse to ensure complete safety.
Shut Off Water Supply Valves
The washing machine has two water supply valves, usually located behind the machine near the wall, one for cold water and one for hot water. Turn both valves clockwise until they are tightly closed. To verify that the water flow has stopped, gently try to twist the valve handles further; if they don’t budge, they’re properly closed.
Drain Remaining Water
Draining the water from the washing machine hoses and drum is crucial to prevent spills. Place a bucket or bowl under the hose ends and use pliers or an adjustable wrench to loosen the hose connections, turning them counterclockwise. Allow the water to drain completely into the bucket. You may need to tilt the machine slightly forward to assist in draining all the water.
Remove Hoses and Clean
Once drained, fully disconnect the hoses from the machine and the wall valves. Inspect the hoses for any signs of wear, bulges, or cracks, and replace them if necessary. Clean the ends of the hoses and the valve connections to remove any debris or mineral buildup.
Unplug the Power Cord
Carefully pull the washing machine away from the wall to access its power cord. Gently grasp the plug (not the cord) and pull it straight out from the electrical outlet. Do not yank the cord, as this can damage the plug or the wiring.
Secure Loose Parts and Tub
If your washing machine has a shipping bolt kit (usually located in the back or bottom of the machine), reinstall these bolts to stabilize the drum during transportation. This prevents damage to the machine’s internal components.
Prepare for Moving
If you plan to move the machine, wrap the power cord and hoses separately to prevent tangling and protect them from damage. Secure any loose parts, and use moving straps or a dolly to safely transport the machine.
Clean the Area
After disconnecting and moving the washing machine, clean the area behind it to remove any accumulated dirt, lint, or moisture. This is also a good opportunity to inspect for any signs of water damage or leaks.
Reconnect at New Location (if applicable)
When reconnecting at a new location, follow the above steps in reverse order, ensuring all connections are tightened properly and the machine is leveled before use.
Safety Tips:
- Always double-check that the power and water supplies are off before starting.
- Wear protective gear like gloves and goggles if you’re concerned about water splashes or debris.
- Be cautious when handling the washing machine, as it can be heavy. Enlist assistance if needed.
- When in doubt about any part of the process, consult a professional or the machine’s manual.
How to disconnect a washing machine – Prepare for Moving or Storage:
Ensuring Safe Handling
a. Clean and dry the washing machine: Before moving or storing the washing machine, wipe down the exterior surfaces with a damp cloth to remove any dirt or detergent residue. Allow the machine to air dry completely to prevent the growth of mold or mildew.
b. Secure loose parts: Check for any detachable parts, such as lint filters or hoses, and ensure they are properly secured. This prevents loss or damage during transportation or storage.
c. Wrap or cover the machine: If the washing machine will be stored or transported to another location, use moving blankets, plastic wrap, or a specially designed cover to protect it from scratches, dents, or dust.

Conclusion:
Proper Disconnection for Peace of Mind
Disconnecting a washing machine safely requires careful preparation, attention to detail, and following the step-by-step guide provided. By turning off the power and water supply, preparing for water drainage, disconnecting the water supply hoses, removing the drain hose, disconnecting the power cord, and preparing for moving or storage, you can safely disconnect your washing machine.
Remember to always prioritize safety, following manufacturer guidelines specific to your washing machine model and seeking professional assistance if needed. Following these steps ensures a smooth and worry-free disconnection process, allowing you to relocate, replace, or perform maintenance on your washing machine with confidence.