Why Your GE Washer Won’t Spin: Common Fixes
Troubleshooting the Lid Switch
The lid switch is a safety device in GE washers to ensure that the machine only operates when the door is closed. If your GE washing machine won’t spin, the lid switch might be the culprit. Begin by cutting off the power to avoid any electrical hazards. You can do this by switching off your washer or unplugging it completely.
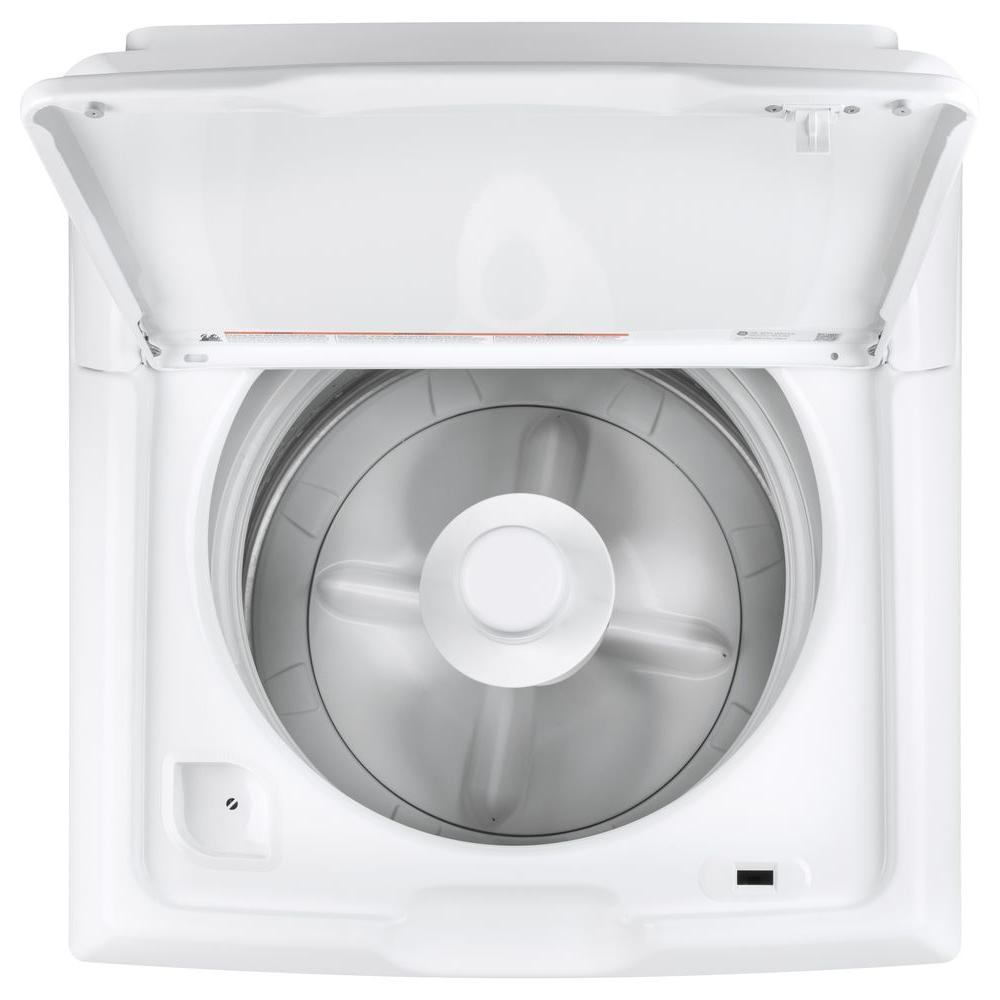
Next, locate the lid switch, which is usually found beneath the washing machine lid. For exact location and instructions, consult the user manual for your specific GE model. With the lid switch in sight, it’s time to grab a multimeter. This tool will help you test for continuity. Set your multimeter and touch its probes to the switch’s terminals. If the multimeter doesn’t show continuity, the lid switch is likely failing and needs replacement.
If the lid switch seems operational, but your washer still doesn’t spin, proceed to the next step in the troubleshooting guide. Checking the drive belt is advisable as the next potential solution to getting your GE washer spinning again.
Examining the Drive Belt Condition
When your GE washing machine won’t spin, the drive belt is a common issue. This belt connects the motor to the drum, allowing it to spin. A faulty drive belt can prevent your washer from spinning correctly, if at all. Ensure the machine is off before you begin. Unplug it for safety.
To check the drive belt, follow these steps:
- Access the Belt: Open the machine’s cabinet as per the user manual’s guidance.
- Visual Inspection: Look for signs of wear, like fraying or splits on the belt.
- Tension Check: Press on the belt gently. It should have some give but not too much.
- Alignment Confirmation: Make sure the belt runs straight over the pulleys.
If the belt is damaged or has slipped off the pulleys, this could be why your washer isn’t spinning. A worn-out belt will need replacing. After making any necessary replacements, reconnect your washer and test to see if it spins. If the problem persists, you may need to examine the motor coupling as your next step.
Checking the Motor Coupling
A faulty motor coupling might be the reason your GE washer won’t spin. The motor coupling is a crucial component that connects the washer’s motor to the transmission. Over time, the coupling can wear out or break due to the strain of regular use.
To check the motor coupling, follow these steps:
- Power Off: Ensure your washer is unplugged or the power is shut off.
- Locate: Find the motor coupling; refer to your washer’s manual for its precise location.
- Inspect: Examine the motor coupling for signs of wear or damage.
- Replace if Needed: If the coupling is broken, it must be replaced for your washer to spin again.
After installing a new motor coupling, plug in your washer, start a cycle, and observe whether the drum spins. If the issue remains unresolved, proceed with further troubleshooting, such as inspecting the door latch.
Assessing the Door Latch Functionality
The door latch is essential for the safety and proper functioning of your GE washer. A malfunctioning latch may prevent your washer from spinning. Follow these steps to assess its functionality:
Step 1: Power Off Your Washer
Safety first: Turn off the power to your washer. This is critical before inspecting any components.
Step 2: Locate the Door Latch
Refer to your GE washer’s manual to find the door latch. Its location varies by model.
Step 3: Examine the Latch Mechanism
For a mechanical latch, make sure the door closes securely and the latch clicks. If it doesn’t click, you may need to replace the latch. For an electric latch, proceed to the next step.
Step 4: Test with a Multimeter
For electric latches, use a multimeter to check for continuity. A lack of continuity suggests you need a new latch.
Step 5: Replace if Necessary
If the tests indicate an issue, replace the latch. Always consult your manual for the correct part.
Step 6: Test Your Washer
Once the latch is replaced, power up your washer. Run a cycle to see if it now spins.
If the door latch is functional but the washer still doesn’t spin, move on to inspecting the motor control board. Misaligned or broken latches are common issues that can stop the spin cycle. Addressing them is a key step in troubleshooting your GE washer.
 Inspecting the Motor Control Board
When troubleshooting a GE washer that won’t spin, examining the motor control board is crucial. This board oversees the electrical signals to the motor, ensuring everything runs smoothly.
Step 1: Power Off Your Washer
Always turn off the power before checking any internal components. This keeps you safe and protects the washer.
Step 2: Find the Motor Control Board
Refer to your washer’s manual for the control board’s specific location. This will vary across different GE models.
Step 3: Inspect for Damage
Look at the board for any signs of burnout or damaged components. Notice any disconnected wires or burnt areas.
Step 4: Test for Functionality
Use a multimeter to test the board. Interruption in continuity signals a problem.
Step 5: Replace if Necessary
If you find damage, or the tests show malfunction, get the right replacement board. Follow your manual for instructions.
Step 6: Reassemble and Test
After replacement, reassemble your washer. Turn on the power, start a cycle, and see if it spins.
If after inspecting and possibly replacing the motor control board your GE washing machine still won’t spin, it may be time to look at the clutch assembly. This is another integral part of the spinning mechanism and could be the cause of your issues.
Evaluating the Clutch Assembly
When your GE washer won’t spin, consider the clutch assembly. This part helps the drum rotate. A failing clutch could stop your washer from spinning.
Step 1: Start a Wash Cycle
Turn on your washer and select a cycle. Look for the drum movement. If it’s still, the clutch may need replacing.
Step 2: Locate the Clutch Assembly
Refer to your manual for the clutch’s location. Each GE model may differ.
Step 3: Check the Clutch
Observe the clutch for wear or damage. If you see any issues, you need a new clutch.
Step 4: Replace if Needed
Get the correct replacement part. Follow manual instructions to install the new clutch.
Step 5: Test the Washer
After installing, turn on your washer. Check if it spins during the cycle.
If the drum rotates after these steps, you’ve resolved the issue. If not, further inspection is needed. The next step is to check the rotor. Learn to assess it in the following section of our troubleshooting guide.
Inspecting the Rotor for Damage
If your GE washing machine won’t spin, a damaged rotor could be the cause. The rotor works with other components to spin the washer’s drum. Damage to the rotor can disrupt this function, leaving clothes damp and the cycle incomplete.
Step 1: Power Off Your Washer
Safety first – always make sure your washer’s power is off before starting.
Step 2: Locate the Rotor
Find the rotor by consulting your GE washer’s manual. Its position may vary by model.
Step 3: Examine for Signs of Damage
Look at the rotor closely. Check for cracks, wear, or broken magnets as these can cause issues.
Step 4: Perform a Continuity Test
Use a multimeter to check for electrical continuity in the rotor. No continuity suggests a problem.
Step 5: Replace if Necessary
If you find damage, order the correct replacement. Install as shown in your manual.
Step 6: Test After Replacement
Once installed, plug in your washer and test a cycle to see if the drum spins.
Inspecting the rotor is essential for a GE washing machine that won’t spin. A malfunction here can halt the whole spin process. After this check, if you’re still facing issues, it’s time to look at the stator windings. The rotor and stator work in tandem, so both should be in working order.
Checking the Stator Windings
After examining the rotor, the stator windings are the next checkpoint. These windings are critical in generating the magnetic field that makes the drum of your GE washing machine spin. A malfunction in the stator can hinder this function, leading to a washer that won’t spin.
Step 1: Ensure Power Is Disconnected
For your safety, verify that your washer is unplugged or the power switch is turned off.
Step 2: Access the Stator
Locate the stator by referencing your washer’s manual. Its position can vary with different models.
Step 3: Visually Inspect the Stator
Look over the stator for any visible signs of damage, such as burnt areas or disconnected wires.
Step 4: Use a Multimeter for Continuity Testing
With a multimeter, test the stator windings for electrical continuity. A lack of continuity is a clear indicator that the stator needs replacement.
Step 5: Install a New Stator if Required
If you discover damages, get a suitable replacement stator. Follow the guidelines in your manual for correct installation.
Step 6: Reassemble and Conduct a Test Run
After replacing the stator, reassemble your washer, restore power, and run a wash cycle to see if the issue is resolved.
Checking the stator windings is a critical step in troubleshooting a GE washing machine that won’t spin. If all components appear to be in working order, but the problem persists, your next step is to examine the drive motor. A non-spinning condition may still require expert attention.
 Drive Motor Inspection and Testing
If your GE washing machine won’t spin, the drive motor could be at fault. This part powers the drum and initiates the spin cycle. A malfunction can prevent spinning, leaving clothes damp. Here’s how to inspect and test the drive motor:
Step 1: Disconnect Power
Always unplug your washer before starting any inspection. This ensures safety.
Step 2: Locate the Drive Motor
Use your washer’s manual to find the drive motor’s exact location.
Step 3: Inspect the Motor
Look for signs of damage or wear that could affect performance.
Step 4: Test with a Multimeter
Check the motor’s continuity with a multimeter. No continuity points to a fault.
Step 5: Listen for Unusual Noises
After testing, turn on the washer. A humming sound may indicate motor issues.
Step 6: Replace if Necessary
If tests show the motor has failed, replace it with the correct part. Follow your manual for guidance.
Step 7: Conduct a Test Run
With a new motor installed, plug in your washer and run a cycle.
Inspecting and testing the drive motor is crucial in troubleshooting a GE washing machine that won’t spin. If the washer still doesn’t spin after replacing the motor, you might need professional help. After all, proper functioning is key for daily laundry routines.
Additional Tips for a GE Washer That Drains but Won’t Spin
Sometimes, a GE washing machine may drain water yet fail to spin. Here are extra tips to solve this issue:
- Check Drain Hose: Ensure the hose isn’t kinked or clogged. Straighten out any kinks and clear blockages if necessary.
- Inspect Spin Switch: This switch should be depressed when the lid is closed. Confirm it’s working and not misaligned.
- Rebalance Laundry: Uneven loads can affect spin cycles. Balance out the items evenly and try again.
- Test the Outlets: Make sure your washer is fully plugged in. Also, test other devices in the same outlet to rule out a power issue.
- Look for Errors: Some models show error codes. Refer to your manual to understand these codes and act accordingly.
- Reset the Washer: Unplug the washer for a minute and then plug it back in. This can reset the system and may resolve the issue.
- Quality of Detergent: Excess suds from non-HE detergents can affect spinning. Use the correct detergent type.
If these tips do not help and your GE washing machine still will not spin, professional assistance may be needed. Expert technicians can diagnose and fix complex problems beyond basic troubleshooting steps.
Understanding When to Call an Expert for Washer Repairs
After walking through the troubleshooting steps for a GE washing machine that won’t spin, you may still come across persistent issues. This is when it’s wise to call in an expert. Here are instances when professional help is necessary:
- Continued Malfunction: If you’ve tested and replaced parts as needed, but the washer won’t spin, a pro can find the root cause.
- Complex Repairs: Some repairs are intricate. For example, changing a motor requires expert knowledge.
- Safety Concerns: Handling electrical components poses risks. Technicians know how to work safely.
- Warranty Preservation: DIY repairs might void warranties. Certified technicians perform approved fixes.
- Time-Saving: Professionals can get your washer running quickly, saving you time and frustration.
- Advanced Diagnostics: Experts use specialized tools for accurate diagnosis that you might not have.
- Peace of Mind: A professional repair comes with assurances. You can trust in the work quality.
Consider reaching out to a certified technician if you’re not confident in your repair skills or if the issue seems too complex. They have the tools, expertise, and experience to get your GE washing machine to spin once again. Plus, it ensures that your machine is fixed correctly without risking further damage or safety. When the laundry piles up, and troubleshooting at home hits a wall, it’s time to call the experts!
