How to remove agitator from washing machine Safely?
Preparing for Agitator Removal
Before you can remove the agitator from your washing machine, it’s important to ensure you’re well-prepared for the task. This preparation will not only make the removal process smoother but also prevent any accidental damage to your appliance or injury to yourself. To begin, follow these steps:
Gather Necessary Tools and Safety Gear
The tools you’ll need can vary based on your washing machine’s model and the type of agitator it has. However, some common tools that are often required include:
- A socket wrench set, which is used to loosen the bolt or nut holding the agitator in place.
- Screwdrivers (both flathead and Phillips) for removing any covers or components.
- An extension for the socket wrench if the bolt is recessed.
- Rubber gloves to protect your hands and provide a firm grip.
- Safety glasses to shield your eyes from any debris.
Additionally, keep a towel or a small bucket handy to deal with any water that may spill out when the agitator is removed.
Power Off and Disconnect the Washing Machine
Safety should be your top priority. Before touching any parts of the washing machine, make sure to:
- Unplug the machine from its power source to eliminate the risk of electric shock.
- Turn off the water supply to the machine to prevent accidental flooding or water damage.
- Drain any remaining water inside the drum if possible, to minimise the mess.
Following these precautions will ensure a safe working environment for you to proceed with the removal of the agitator.
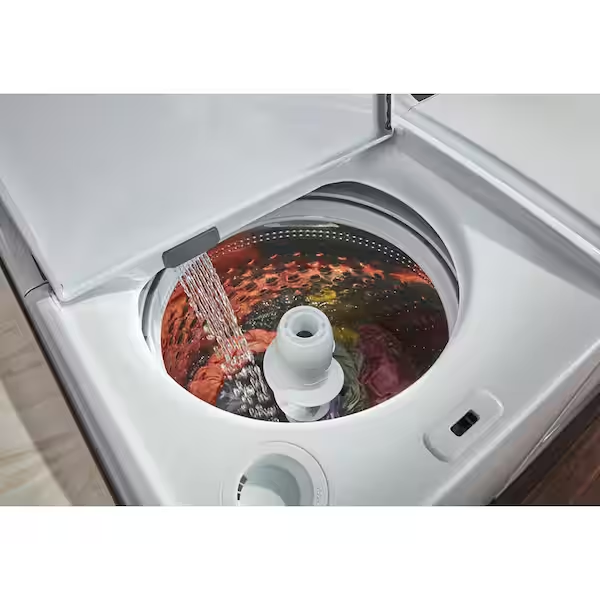
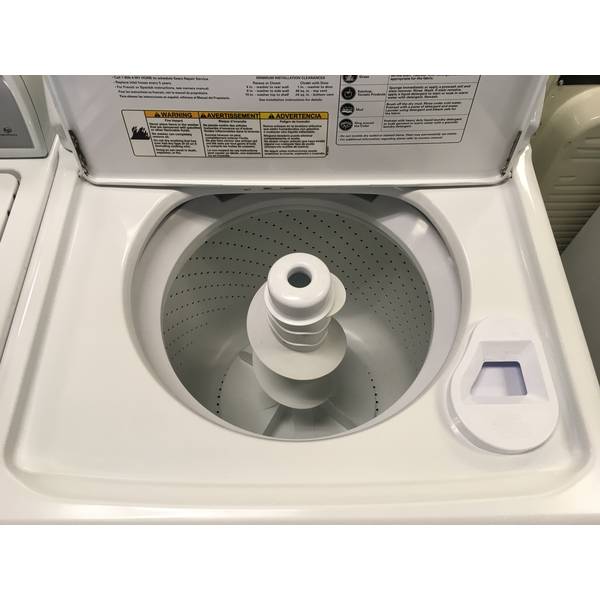
Accessing the Agitator
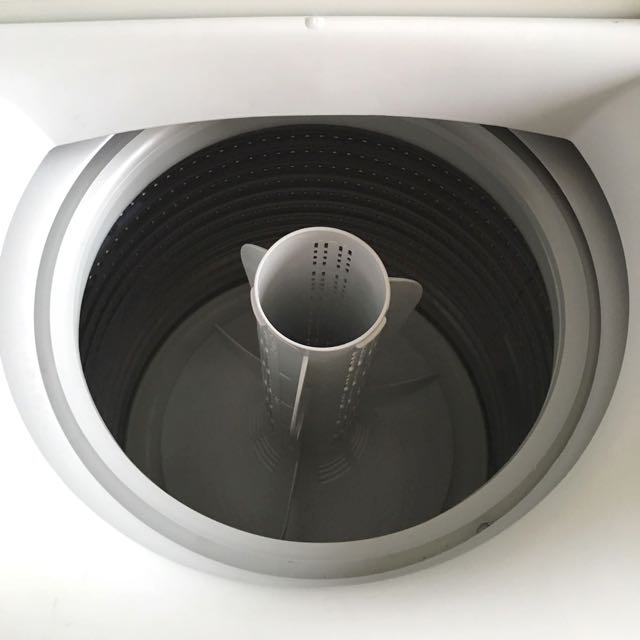
With the preliminary steps out of the way, you can now focus on accessing the washing machine agitator. Typically, the agitator can be found in the middle of the drum. To get to it:
- Open the washing machine lid or door fully to have ample workspace.
- Remove any clothing or objects that are inside the drum.
- Depending on your model, there may be a fabric softener dispenser or a cap on top of the agitator that needs to be taken off. This can usually be done by gently pulling or twisting it.
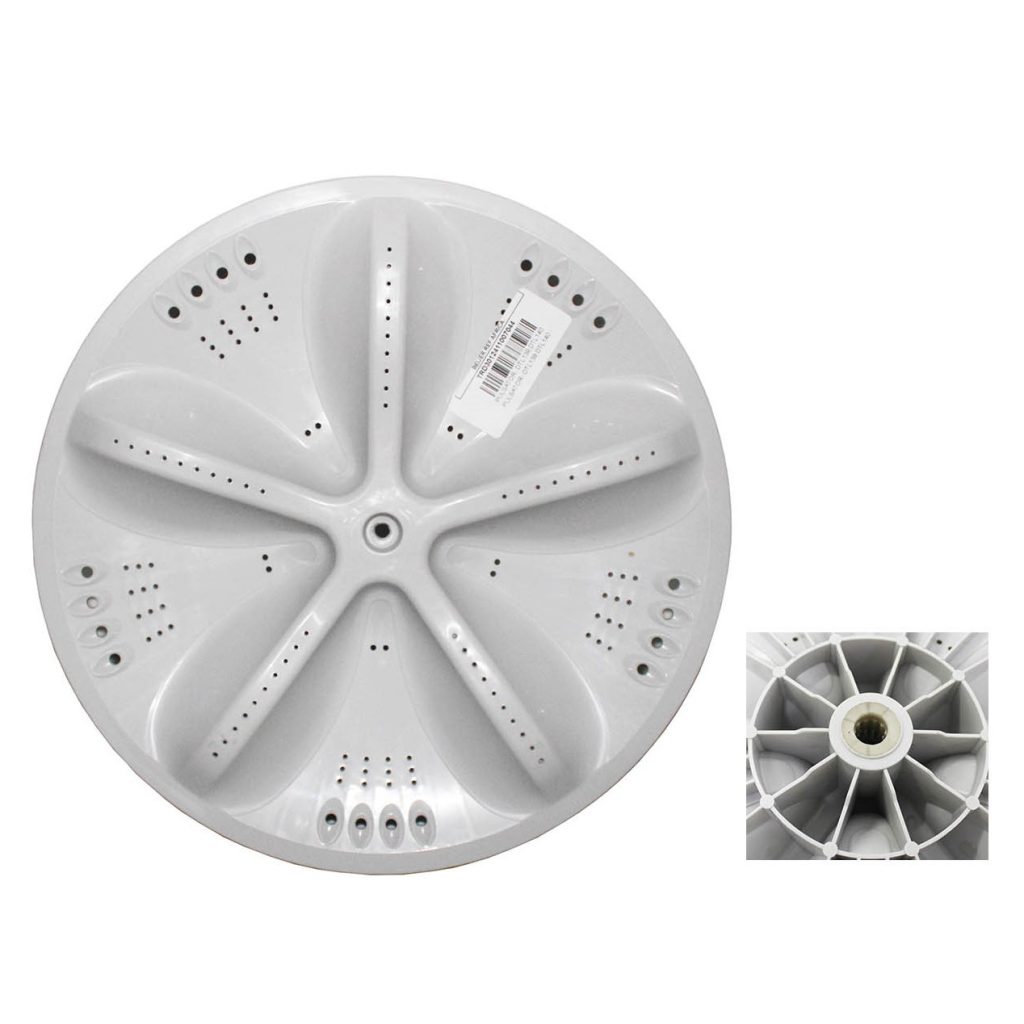
- Once the dispenser or cap is removed, you should see the fastener (usually a bolt or nut) that secures the agitator to the transmission shaft.
The above steps will set you up for the actual removal of the washing machine agitator, which will involve specific actions depending on the type of agitator you are dealing with.
Removing the Washing Machine Agitator
Once you have successfully prepared for the agitator removal and accessed the agitator, it is time to move on to the actual removal process. Removing a washing machine agitator can be a straightforward task if done correctly. However, identifying the type of agitator your machine has is crucial before attempting to remove it.
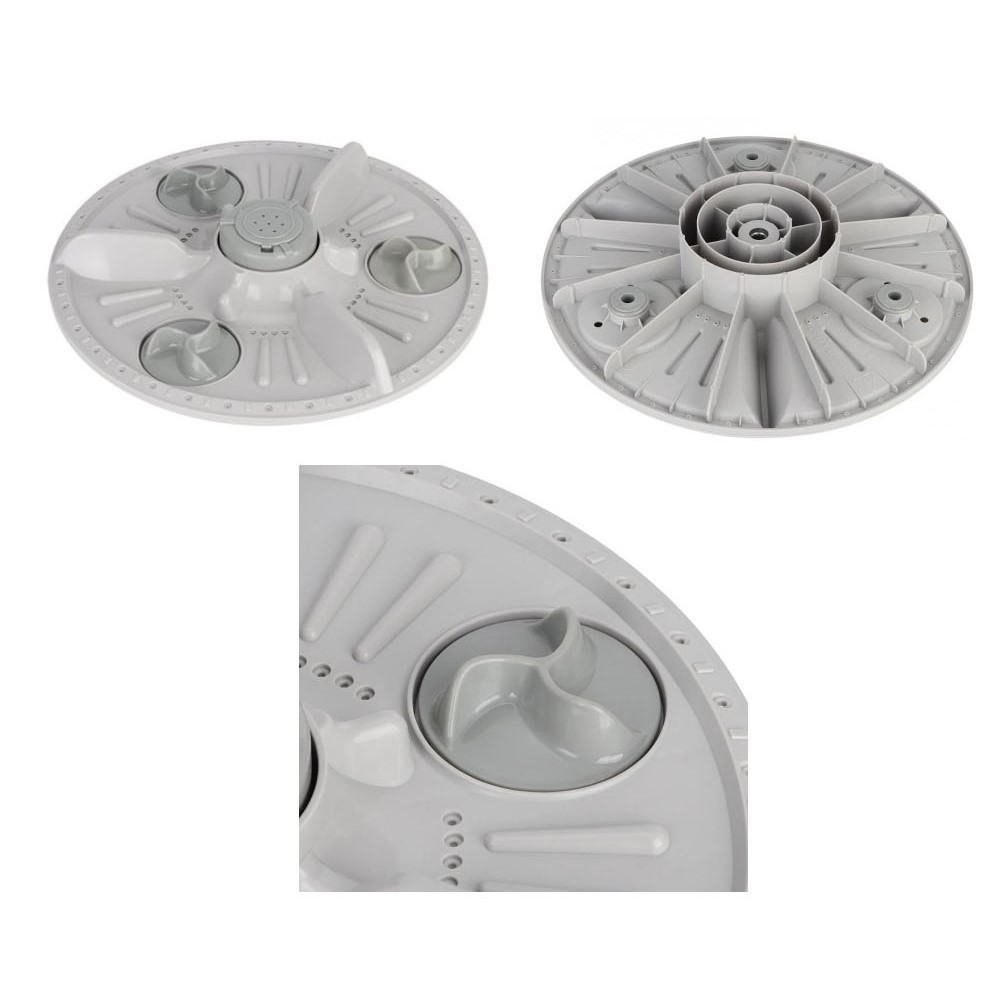
Identifying the Agitator Type
There are two common types of agitators found in washing machines: the single-action agitator and the dual-action agitator. Single-action agitators typically move in one direction and are easier to remove. Dual-action agitators, on the other hand, have a top piece that moves independently from the bottom, making them a bit more challenging.
Here are some steps to help you identify your agitator type:
- Look for the model number of your washing machine and refer to the manual or manufacturer’s website.
- Observe the motion of the agitator during a wash cycle (prior to disassembly) to determine if it has a dual-action mechanism.
- Check for a second bolt or fastener that may hold the upper portion of a dual-action agitator.
Step-by-Step Removal Process
Once you have determined the type of agitator installed in your washing machine, follow these steps for a step-by-step removal:
- For single-action agitators, use your socket wrench to loosen and remove the bolt that holds the agitator in place.
- Pull the agitator straight up; it might require some force. If it is too difficult to remove by hand, you can purchase or rent an agitator pulling tool from a hardware store.
- For dual-action agitators, after removing the main bolt, also check for any additional fasteners for the upper agitator. Remove any that are present before pulling out the two pieces.
- Keep a steady hand and firm grip as you pull to avoid any sudden movements that may cause damage.
Handling Difficulties and Obstructions
You may encounter resistance or obstructions when trying to remove the agitator. Here are some tips to handle these challenges:
- If the agitator is stuck, try wiggling it back and forth gently to loosen it up before giving another pull.
- In case of corrosion or buildup around the agitator shaft, use a penetrating oil to break down the residue. Allow it to sit for a few minutes, then attempt removal again.
- If an agitator is particularly stubborn, consider consulting a professional to prevent damaging your machine.
With patience and the right approach, you can successfully remove the agitator without causing harm to your washing machine or yourself. The next steps will involve cleaning and inspecting the agitator and drum area, making necessary repairs, and reassembling the machine to ensure it is functioning properly.
After Removal Procedures
Once the washing machine agitator has been successfully removed, it’s important to follow up with post-removal procedures to ensure everything is clean, in good condition, and put back together correctly. This not only helps in maintaining your washing machine’s efficiency but also extends its lifespan.
Cleaning the Agitator and Drum Area
After the agitator is out, you have a unique opportunity to clean areas that are typically hard to reach. Follow these steps to ensure thorough cleaning:
- Inspect the agitator and the drum for any lint, soap scum, or debris. These are common in washing machines and can affect performance if not removed.
- Use a mild detergent or a vinegar and water solution to wipe down the agitator. For tough grime, an old toothbrush or a soft-bristled brush can help in scrubbing it off.
- Clean the drum area where the agitator was seated, as well as the other parts of the drum. Make sure the water jets and drain holes are not clogged.
- Dry everything thoroughly before proceeding to the next step. A damp environment inside the washing machine can lead to mold and unpleasant odors.
Inspecting for Damage and Making Repairs
With the agitator removed, it’s an opportune time to inspect components for any signs of wear or damage:
- Check the agitator splines and the shaft for any signs of stripping or damages. If these parts are worn, they may need to be replaced to prevent future problems.
- Ensure that the transmission shaft that turns the agitator isn’t damaged or corroded. If you notice any issues, contacting a professional for repairs is advisable.
- Look over the seals and bearings that might be exposed now. If they show any signs of leaking or deterioration, consider replacing them.
Reassembling and Testing the Washing Machine
Finally, after cleaning and inspection are completed, it’s time to put the agitator and washing machine back together:
- Carefully position the agitator back on the transmission shaft, aligning it properly with any grooves or splines.
- Secure the agitator by tightening the bolt or nut that you previously removed. Ensure it’s snug but not overtight, as this could strip the threads.
- Reattach any dispensers or caps that were on top of the agitator.
- Reconnect the washing machine to the power and water supply.
- Run a short wash cycle without any laundry to ensure that the agitator is working correctly and no leaks have developed.
 When to Call a Professional
While removing the agitator is a task many can handle, certain situations call for professional assistance. If you encounter persistent issues that simple troubleshooting can’t resolve, it might be time to call a technician. Additionally, if your washing machine has advanced features or is a high-end model, professional service ensures no further damage occurs.
Calling in a professional not only resolves the issue but can also provide valuable insights into maintaining your washing machine. Investing in professional help can save money and time in the long run, ensuring your appliance remains in top-notch condition.
Maintaining Your Washing Machine
Ongoing maintenance can prevent many issues associated with the agitator. Regularly clean the drum and agitator to remove any residue buildup. Periodically check the agitator for signs of wear and address them promptly.
Using the correct detergent type and amount can also significantly impact the machine’s performance. Additionally, avoid overloading the washer, as this can strain the agitator and other components. These practices help your washing machine function efficiently and prolong its lifespan.
Final Thoughts
Following these after-removal procedures ensures that not only is your washing machine agitator functioning correctly, but also helps in maintaining the overall health of your appliance. Regular maintenance, combined with careful handling during repairs, will keep your washing machine running efficiently for years to come.